

I LOVE slippers!!! I love making them, wearing them and especially giving them as gifts! My favorite slippers are ones that are squishy soft, easy and quick PLUS don’t take an engineering degree to whip up.
With all that in mind…I hope you will LOVE these slippers. They truly make the “Best Gift”!
I used the new Soft Essentials yarn from Red Heart and I LOVE this yarn. LOVE LOVE LOVE everything about it. It is a size 5, bulky weight with a touch of sheen. It is easy to use and doesn’t split like some bulky yarns will. The colors are fun and coordinate beautifully.
The skeins are a really nice size, with 110 (variegated) to 131 (solid) yards. That’s enough to easily make a pair of slippers with the two skeins. It is affordable and can be found at Michaels (online and in store) and from Red Heart’s website.
Want to save this for later?
- CLICK HERE to add it to your favorites on Ravelry.
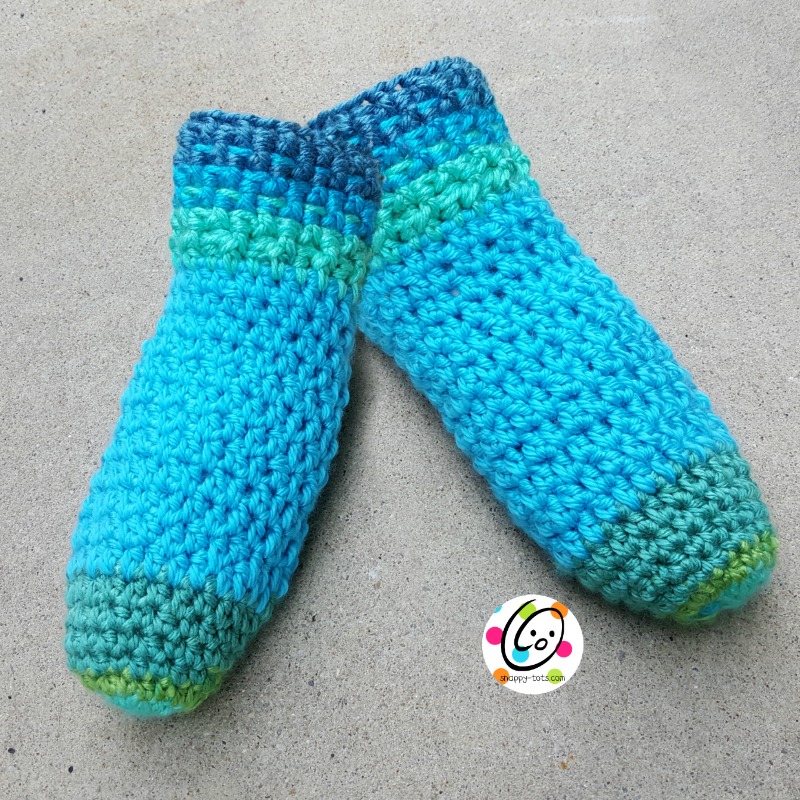
Essential Slippers For Women
These are designed to fit women, teen-adult. More sizes to come.
Project Info
- Project Description: easy slippers, made from toe to cuff. No seaming needed.
- Skill Level: Basic crochet skills are needed and must be able to read a crochet pattern.
- Completion Time (how long it takes the designer to make one): 3 hours for a pair. Of course this time will vary, but hopefully gives an idea. I always like to know approximately how long to plan for a project.
Materials and Details
- Yarn: 2 skeins Red Heart Soft Essentials (size 5). Sample was made from Turquoise and Jungle Stripe
- Hook: K
- Misc: a yarn needle for weaving in ends, tape measure
Special Stitch
Double Hdc (there might be a name for this but I am not aware of one.): YO twice, insert hook in next st and pull up a loop, YO and pull through all loops on hook. Tip: pull through 2 loops, rotate the hook and pull through the last 2 hooks.
Help Tips
~ Yarns of SIMILAR WEIGHT may be substituted but may affect size and appearance.
~ Work in continuous rounds, placing a marker to keep track of beginning of round.
~ WARNING: these are SLIPPERY and should be worn on carpeted surfaces.
Instructions
Make 2.
1. With K hook and contrasting color for toe, start with magic circle of 9 sts (or preferred method of starting a circle of 9 sc sts), pull closed and place marker for working in the round. (9sts)
- 2sc in each st to end of round. (18)
- hdc in next st, sc in next st, repeat a total of 4 times, 2sc in next st, hdc in next st, sc in next st,
repeat until 1 st remains, 2sc in last st. (20) - hdc in next st, sc in next st, repeat a total of 5 times, 2sc in next st, hdc in next st, sc in next st,
repeat until 1 st remains, 2sc in last st. (22) - hdc in next st, sc in next st, repeat a total of 6 times, 2sc in next st, hdc in next st, sc in next st,
repeat until 1 st remains, 2sc in last st. (24) -
hdc in next st, sc in next st, repeat a total of 7 times, 2sc in next st, hdc in next st, sc in next st,
repeat until 1 st remains, 2sc in last st. (26) -
Change yarn colors for main part of foot section (optional). hdc in next SPACE between posts of previous round), dc in next st, repeat to end of round.
-
Repeat step #7 until slipper is 2” shorter than desired length. See size chart at end of pattern.
Tip:
Keep track of number of rounds worked so you will be able to make the next slipper the same length.
9. Sc in next st. This steps starts the heel. Ch 1, turn, sc in same st, work one double hdc (see “special stitches” above) in each of next 10 sts, sc in next st. (12sts) There will be sts left unworked.
- Ch 1, turn, sc2tog, work one double hdc in each of next 8 sts, sc2tog. (10sts)
-
Ch 1, turn, sc in same st, work one double hdc in each of next 8 sts, sc in next st.
-
Ch 1, turn, sc2tog, work one double hdc in each of next 6 sts, sc2tog. (8sts)
13.This step is worked around the slipper opening. Do not chain 1. hdc 3 evenly along side of slipper opening, hdc2tog, hdc 14, hdc2tog, hdc 3, hdc2tog, hdc 3, hdc2tog. (27sts)
- Change yarn colors for cuff. FPDC around next post, BPDC around next post, keep repeating to end of round, do not join. Since there are an uneven number of sts, if we continue to work the same repeat in the round the sts will not line up. That is GOOD! Place a marker and continue repeating FPDC, BPDC until cuff is desired length.
Finish off and weave in ends.
I hope you enjoyed making this quick and easy project. I would love to see your creations. Please add your project to Ravelry and/or share online and include #snappytots.
Thanks for crocheting with me!
~ Heidi
Please follow Snappy Tots on your favorites social media sites for giveaways, new release announcements, events and fun.
Facebook, Pinterest, Instagram, Twitter
Check out my shop for almost 500 patterns!
Shop Now
Stay Up to Date with all things Snappy by receiving our weekly newsletter.
Get The Newsletter
If you have any questions, comments or suggestions please
send me an email
<
p style=”text-align: center;”>I will see that quicker than in the comments below.
![]()
![]()
Items made from Snappy Tots’ patterns MAY be sold. Please include a link to snappy-tots.com if selling online.

