

This summer, while on our way to Mount Rushmore, I realized I had left my water bottle at home. I like to have one with a short handle to hang from my truck door. We do have lots of cup holders, but this is close and handy… plus my husband tends to hog the other ones in the front.
So it was just a matter of time before I’d had enough and whipped out some yarn. I had a skein of Red Heart Super Saver Ombre in Violet and decided to give it a try. I love how it turned out. I enjoyed the look of this stitch pattern so much that I ended up adding more to the “snappy friend” collection 🙂
Check out these patterns with a similar stitch:
- Snappy Friend Beanie
- Snappy Friend Shawl (includes blanket instructions…next on my project list!)
- Snappy Friend Scarf
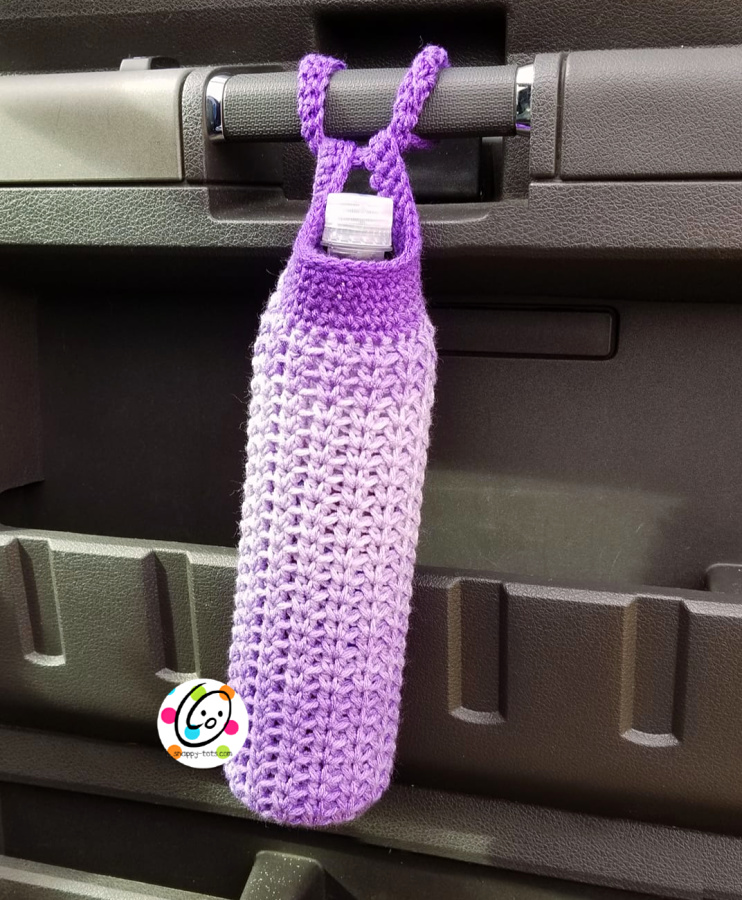
Snappy Friend Water Bottle Holder
An ad-free, downloadable PDF which includes all of the photos and instructions is available for only $2.
Materials and Details
- Yarn: worsted weight. Sample – Red Heart Super Saver Ombre.
- Crochet Hook: H
- Miscellaneous: yarn needle for weaving in ends.
- Gauge: Not important for this project. Instead, check measurements along the way, as listed in pattern.
- Measurements: 9-9.5” tall x 4.5” wide. Handle – 12-14” long.
Directions
1. With H hook and yarn, start with a magic circle of 8 sts (or preferred method for starting a circle of 8 sc sts), pull closed and place marker for working in the round. (8sts)
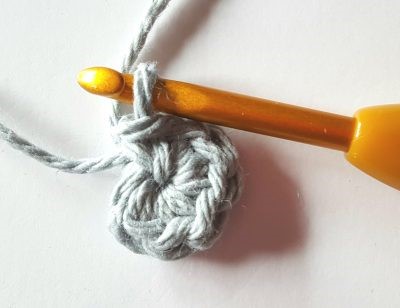
2. 2sc in each st to end of round. (16sts)
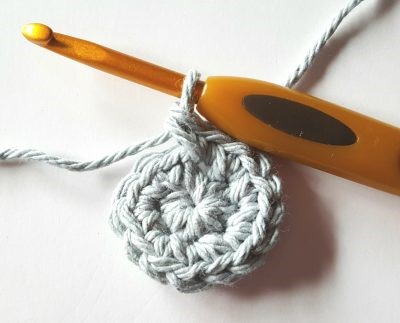
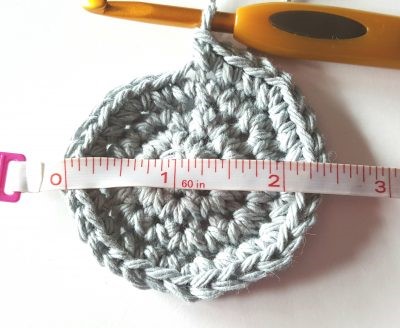
3. *Sc, 2 sc in next st*, repeat to end of round. (24sts) 1.75″ across
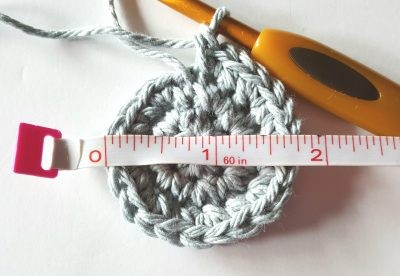
4. *Sc 2, 2 sc in next st*, repeat to end of round. (32sts) 2.25-2.5″ across
5. *sk 1, 2hdc in next st*, repeat to end of round.
6. Tip: Think of the 2hdc in one stitch in the shape of a “V”. The 2hdc in the next round is worked between the 2hdc posts, in the the valley of the “V”.
*2hdc between posts of 2hdc from previous round*, repeat to end of round.
7. Repeat previous round until piece measures 8” from starting point/beginning circle (measure flat).
8-9. Sc in each st to end of round.
10. Place marker for start of round. This step starts the handle. Sl st in next st, ch 50 for a short handle
as shown in main photo (ch 120 for a shoulder length handle), sk 2 sts on rim, sl st in next st, sc in
each st on rim to end of round.
11. Sc in each ch across handle, sc in each st to end of round.
12. Sl st in each st across handle, sc in each st to end of round.
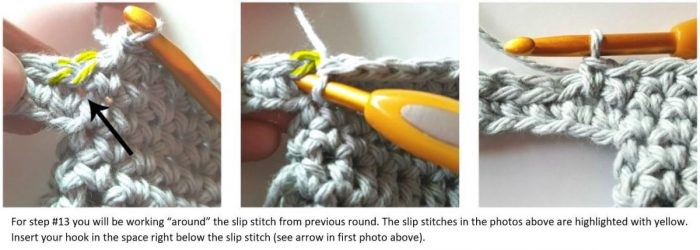
13. For the first part of this round, please refer to photos below. Sc across handle, working into space
below each sl st. Sc in each st to end of round. Working “around” the sl st round creates a
stronger handle.
14. Sc in each st across handle and in each st to end of round.
15. Sl st in each st across handle and in each st to end of round. Finish off and weave in end.